How to backup your WordPress Website using ManageWP?
How to backup your WordPress Website using ManageWP?
Website Backup is a very important process. Every blog owner should know how to perform daily or a scheduled backup of their website? Today, I am going to discuss in detail about taking daily backup of a WordPress website using ManageWP.
ManageWp is a service like GoDaddy Pro Dashboard. ManageWp is powered by GoDaddy. Both have the same feature of providing some great options for WordPress Website like backup, SEO Add-ons, Performance Monitor, Uptime Monitor, Keyword ranking monitor and many more.
Do you know, why I am writing this post? A friend of mine from Bangalore has started a WordPress website and worked hard for 6 months. He had written more than 50 blog posts. His website started performing well day by day. But, one day he was trying to install Free SSL (Which I never recommend) and in this process, an error has occurred. Unknowingly he reset his WordPress without taking a backup and lost his posts and work.
If he was using GoDaddy managed WordPress hosting which provides automatic backup or ManageWP then the case would have different.
So, always take a backup of your WordPress or other site before doing anything which you don’t know.
Let’s see the step by step process to perform backup of a WordPress website using ManageWP.
How to create WordPress website backup using ManageWP?
To create a backup using ManageWP. First, you need to create an account. Once the account setup is done then you need to link your WordPress with ManageWp. See how it goes –
Completing the Onboarding on ManageWP
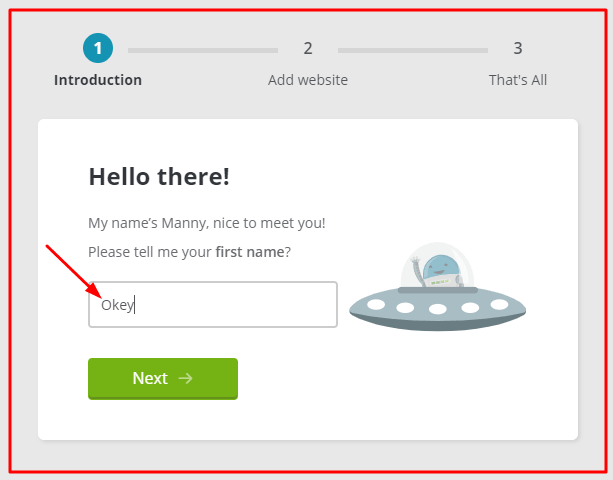
This process comprises three steps: Introduction, adding your website and run the backup that’s all.
1 Open ManageWP signup link
2. Enter your email to signup and confirm the email
3. Once the Signup Process completes then you will be redirected to the Onboarding Process
4. Enter your first and last name
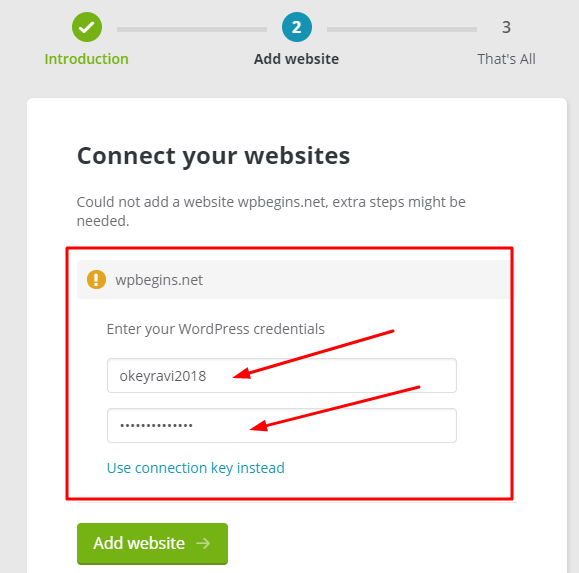
5. Add your website to ManageWP – This can be done in two ways. Have a look –
#1. Using WordPress Username and Password
#2. Using API Key – If you want to authenticate your website using API key then please install the ManageWP Worker plugin manually. The ManageWP Worker plugin needs to be installed and activated. Once done, try adding the website again. For this, you need to enter the connection key found on the website’s plugin page, in the Worker plugin description.
After getting the key, add it to the given field on ManageWp website and click on add website button. It will authenticate your website credentials and take you to the dashboard.
I think you have connected your website to ManageWP. Now it’s time to setup the backup process.
Activating Backup using ManageWP for WordPress
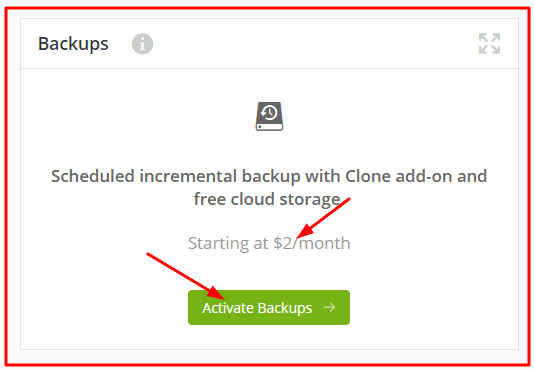
Open your ManageWP dashboard and navigate to the backup section. There are two plans which you can opt. Free and Premium. It’s totally up to you which plan you choose? But, If you ask my recommendation I will suggest you
Personally, I am using the Premium plan. It is cheap and reliable.
ManageWP Free Plan details
- Monthly backup schedule
- Secure cloud storage
- Restore at any time
ManageWP Premium Plan details
- All free plan features
- Daily, Weekly, Monthly backup schedule
- 30 days backup store
- On-demand backups
- Backup to Dropbox, Google Drive, OneDrive, S3
- Clone & migrate websites options
- Download backup archive enabled
- Template Builder
Note: If you buy a WordPress Managed hosting plan from GoDaddy then the ManageWP premium feature will be provided free via GoDaddy Pro Dashboard.
For your ease, I am going with Free plan now. You can upgrade your plan anytime. So, Activate your backup plan.
Once you activated the plan. Now you have to choose the backup region and the files you want to backup including databases. Go with the recommended setting here. Once done click on the
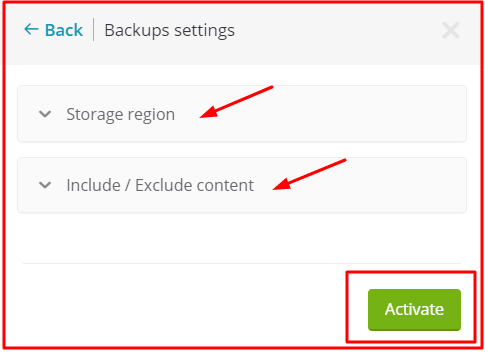
After activation, the backup of your website will be created instantly. You can check the progress of backup on ManageWP Dashboard.

Hurray! You have successfully performed your first backup.
Restoring the backup of WordPress Website using ManageWP
Once the backup progress completes, you can restore this anytime. The restoration process is very easy. You just need to click the restore button. That’s it. Isn’t it great?
Once you click the restore button, they will ask to include or exclude content and assign a new admin. If it is required, you can do it accordingly. Otherwise just left it and click on the restore button.
It will take 2-3 minutes max to complete the restore process. Sometimes, depending on your backup size it might take a bit more time also.
What more you can do with ManageWP?
Here is a list of activities which can be added later in your ManageWp dashboard. Some of them are free but some are available for on a nominal charge.
- SEO Monitor
- WordPress Website Uptime Monitor
- Website Performance Monitor
- Website optimization
- Update WordPress theme and plugins
- Free Security Check
- Free Client Report
- White Label
- Analytics and more

So, I hope this post is beneficial for you and now you know how to take backup of any WordPress Website?
If you liked this article, then please subscribe to our YouTube Channel. You can also find us on Twitter and join our Digital marketing hacks Facebook group.
If you have any doubt, comment below.
Read Next – 7 common SEO mistake you should Avoid

